Stardate -310356.39 (May 11th, 2013)- Captain's Log- This is it. Test day. The peace of the entire galaxies depends on a successful launch today. No pressure. But further studies reveal that our original concept would not work at all. The weight needed to "snap" to create the sling action required to launch something from a trebuchet. Major redesign ahead. All done with recycled parts mind you. Quite a triumph.
 |
| The weight needed to hang and be concentrated. So the PVC pipe was cut, now acting as an anchor. Sand has been booted to the side. No more. |
 |
| The inside of the now cut PVC pipe |
 |
| Major hack 'n' slash |
 |
| "Sometimes genius takes time and sacrafice"- said some dude somewhere |
 |
| Simply the remaining length of the fence post now |
The idea is for the weight to hang from the PVC pipe, so what is needed is an anchor to hang the weight from the PVC pipe. Two screws with holes in the tops drilled through the pipe and into a block of wood should suffice.
 |
| The block is just scrap that was lying around in the shop (garage) |
 |
| On the right you can see the eye lag screw. These are designed for ceiling tiles. I'm gonna use it to hold 20 lbs. |
 |
| They make quite the pair, don'tcha think? |
 |
| Take an old clothes hanger, pilers, and my brother's weights, you get art |
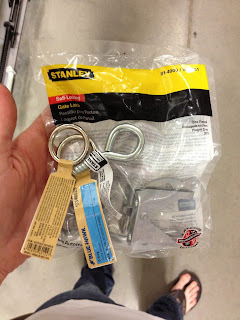
Now to set up the trigger mechanism. An eye hook is combined with a fence latch to create mine. On the right side the eye hook is screwed in, while the fence latch is screwed on the same parallel plane on the opposite side. Above the latch, a small eye hook is place to thread the rope through to be able to pull back, away from the firing direction. A rope is measured to the width between the two components and a metal loop is tied to the end. That rope is tied to the eye hook. This will hold the arm down is a loaded position with the ability to lift the latch, then releasing the arm.
 |
| The secure point for the rope |
 |
| The fence latch |
 |
| Our rigging for the trigger |
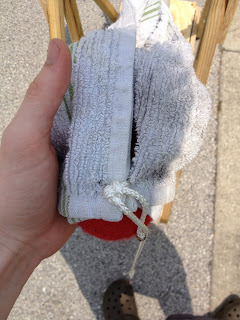
Now for the sling or the pouch. The original design was an old dishrag threaded together with rope to create the pouch.
 |
| Holes are cut in the corners |
 |
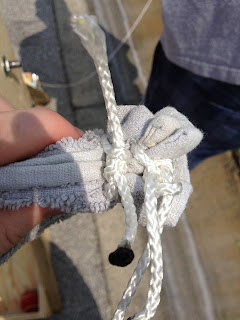
| Rope is threaded through the corner holes |
 |
| Once tied, a pouch is made |
The first rope attached to the pouch is secured near the top of the arm. The other rope has a metal ring the hooks at the top. When the arm reaches the top of its arc, the momentum of the sling carries the projectile out and forward, while the arm itself stops.
 |
| The secure line |
Now there were a total of 12 test launches done. Any of the following is either results or adjustments. I shall specify. This post will only contain the relevant tests, while there will be another post with them all. Also to note, I was waiting for my mother to comeback with water balloons from her errands. Until she arrived I tested with a tennis ball. I am aware the directions said a tennis ball would not suffice.
Test #1- Tennis Ball with Cloth Sling- 20 lbs.
As you can see the tennis ball did not even leave the pouch. It got caught inside the pouch. We decided to seal off the ends of the rag more securely, in hopes that it would launch.
 |
| The force sent the ball into the end of the pouch, trapping it there |
 |
| Whoops |
 |
| Tying off the ends |
 |
| The finished product |
Two more tests with the tennis ball followed. In the second test the trigger locked up and the third resulted in the tennis ball launching 20 feet. After these tests, my father and I decided that a new material would be needed for the sling. And what high school science project doesn't have duct tape?
 |
| Paper in between strips of duct tape |
 |
| Design settled on and cut out with an exacto knife |
 |
| Straight edges all the way |
 |
| Threading the rope through the duct tape pouch |
 |
| All rigged up |
 |
| Ready. Set. Launch! |
From here on out, adjustments were made in rope length, weight, and size of the balloon (all within orange sized dimensions). Those changes shall be specified before each video.
Test #4- Water Ballon with Duct Tape Sling- 20 lbs.
The water balloon had air inside (quite a bit), which is why it popped so soon. That was adjusted. The next launch, the balloon went backwards. We then adjusted the length of the rope on the pouch to make it shorter. This would keep the tension tight, until the point we wanted for release.
Test #6- Water Ballon with Duct Tape Sling- 20 lbs. Shorter Rope
The balloon launched 22 feet, just 3 feet short of the required 25ft. After this test the hanger holding the 20 lbs. snapped. I went back and took out the block and screws. Then drilled bigger holes and simply threaded the rope through the weights three times. Also an extra ten pounds was added, bumping it up to a total of 30 pounds.
Various tests were done after the new weight, all adjusting the length and balloon size. The balloons varied between orange and grapefruit. It was found out that a balloon too big would be crushed by the force in the pouch at launch before it could even leave. Finally the magic lengths and size were discovered.
Test #11- Water Ballon with Duct Tape Sling- 30 lbs.
As you can see the right mixture of length, weight, and size all came together to launch the balloon well beyond the required 25 feet. Almost double the length at a solid 45 feet.
The physics of a trebuchet-
A trebuchet catapult is, in its simplest form, a first class lever. One end has a large mass and the other has the sling with the projectile. The end with the large mass is lifted and then secured with some form of a trigger (in my case a rope hooked to a fence latch); this creates potential energy. When the mass is released it drops it turns the stored potential energy into kinetic energy, due to gravity, and swings the end with pouch/projectile up. This swinging motion is in the shape of an arc. At a certain point the hooked end of the sling is released and the projectile flies out of the pouch, using its own momentum. The projectile then continues in the arc the arm had and descends down to Earth due to gravity.
These were the journeys of the Trebuchet Enterprise. It's continuing mission, to use household products, to be structurally sound and make physics proud. To boldly launch balloons where no balloon had gone before.


